01 — Your First Scene
Quickstart and the Guided Tour both get you into GlyphViz by opening something — a provided example, or a scene built by clicking N in the GUI. This tutorial does the opposite, on purpose: you'll hand-type a real gv_node.csv in a plain text editor, a few bytes at a time, and watch GlyphViz render exactly what you wrote. That's the skill that actually matters once you're past the tutorials — every real GlyphViz scene, whether it comes from a Python script, a spreadsheet export, or the Claude Skill, is this same file format underneath. Knowing what the bytes mean is what lets you trust (and debug) whatever generates them for you later.
You need: GlyphViz installed (Installation) and any plain text editor (Notepad is fine — just make sure it saves plain .csv text, not rich text).
1. Make a folder
Create a folder called My_First_Scene. Everything in this tutorial lives there. GlyphViz identifies a node CSV by its columns, not its filename, but naming it gv_node.csv matches the convention every example in the Examples Gallery uses, so stick with it.
2. The bare minimum: one node
A GlyphViz scene needs exactly 20 required columns — no more, no less, and the loader refuses to open a file missing any of them. That sounds strict, but it's a short list once you see it laid out:
| Column | What you're setting |
|---|---|
id |
This node's unique number. Start at 1. |
type |
5 — an ordinary glyph (the value every visible node in this tutorial uses). |
parent_id |
0 means "no parent — this is a root." |
branch_level |
Tree depth. Roots are 0. |
translate_x/y/z |
Position. With topo=0 below, these are plain Cartesian offsets. |
rotate_x/y/z |
Orientation, in degrees. 0,0,0 is unrotated. |
scale_x/y/z |
Size per axis, rendered exactly as written. Anything much below 0.2 gets hard to click — turn on View → Enforce Minimum Glyph Size if you want tiny nodes clamped up to a grabbable size. |
color_r/g/b/a |
0–255 each. |
geometry |
Which shape. 11 is a solid Octahedron — ANTz's traditional starter glyph. |
hide |
0 = visible. |
topo |
How this node's children get placed. 0 = None (plain Cartesian) — the simplest option, and what this whole tutorial uses. Tutorial 3 is where this field gets interesting. |
Open your text editor and type this exactly — header row first, then one data row:
id,type,parent_id,branch_level,translate_x,translate_y,translate_z,rotate_x,rotate_y,rotate_z,scale_x,scale_y,scale_z,color_r,color_g,color_b,color_a,geometry,hide,topo
1,5,0,0,0,0,0,0,0,0,1,1,1,242,121,61,255,11,0,0
Save it as My_First_Scene/gv_node.csv — plain text, UTF-8 (Notepad's default "Save as type: Text Documents" is fine).
Now open it in GlyphViz: File → Open, or just drag the file onto the window. You should see one orange octahedron, sitting at the origin.
If nothing appears
The loader reads columns by name, not position — a misspelled header (traslate_x, colour_r) is the most common reason a hand-typed file fails to load, and pandas' error will name the exact column it choked on. Column order doesn't matter, so don't worry about matching the table above exactly, just the spelling.
3. Give it a child — hierarchy in one more row
Hierarchy in GlyphViz is nothing more than a second row pointing at the first. Add this line under the one you already have:
2,5,1,1,3,0,0,0,0,0,0.6,0.6,0.6,90,200,255,255,3,0,0
Before you reload, read what you just typed: parent_id=1 points at your first node, and branch_level=1 is one level deeper than the root. translate_x=3 — because the parent's topo is 0 (None), that 3 is a plain offset of 3 units along the parent's local X axis, nothing fancier. Smaller scale (0.6), a different color, and geometry 3 (solid Sphere) so it's visually obvious which node is which.
Save the file, then File → Open it again. You should now see your octahedron with a small blue sphere sitting off to one side — and if you select the octahedron and move it (Move tool, or edit its translate_x/y/z in the Properties panel), the sphere rides along with it. That's the whole hierarchy model: parent_id builds the tree, and a child's position is always relative to its parent, not the world.
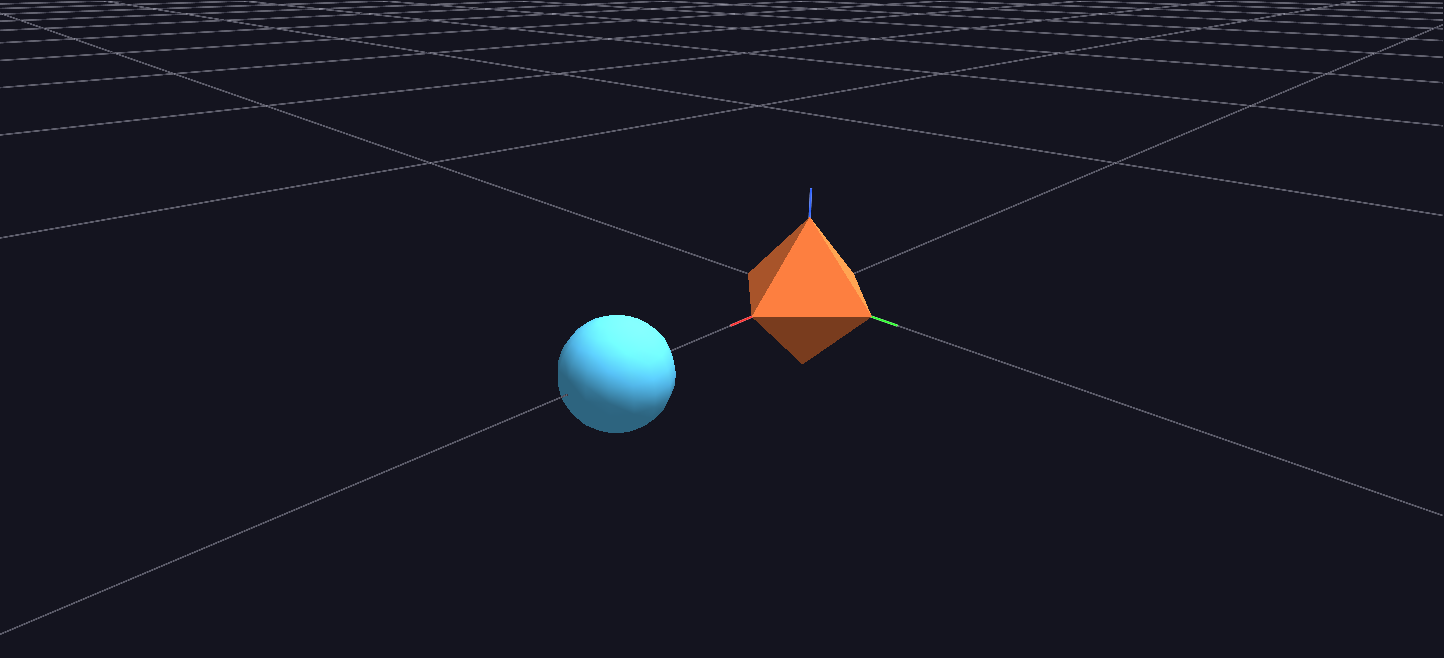
If your screen doesn't match — no sphere, wrong side, overlapping shapes — that's your cue to go back and check parent_id, translate_x, and scale_x/y/z on row 2 before moving on.
4. Close the loop: edit, save, watch it update
Re-opening the file by hand after every edit gets old fast, and it's not how you'll actually work once a script is generating this file for you. Turn on File → Watch and Reload (Ctrl+R) once — GlyphViz then polls the open file's timestamp and reloads automatically whenever it changes on disk, keeping your camera position and selection intact across the reload.
With that on, go back to your text editor, change node 1's color — try color_r,color_g,color_b = 80,220,120 — and save. Switch back to GlyphViz without touching anything in it: the octahedron should already be green. This edit → save → watch-it-update loop is the actual day-to-day GlyphViz workflow for anyone generating scenes from data, which is most real use.
5. What just happened
Everything you just did by hand is the same model every scene in GlyphViz uses, no matter how it's produced:
- A scene is rows in a CSV. Nothing about a node exists outside those columns.
parent_idis the entire hierarchy — no separate tree structure to maintain.- A child's
translate_x/y/zis interpreted in its parent's coordinate system, and withtopo=0that system is the simplest one: literal Cartesian offsets. - Two nodes, twenty columns, one relationship — and it's already a real hierarchical scene, not a toy.
Core Concepts covers this same model in more depth if you want the full picture before moving on.
Next step
Tutorial 02 — Tags & Hierarchy builds directly on the two-node file you just made: giving your nodes readable labels, and going deeper on what a hierarchy can express beyond "one thing offset from another."
If hand-typing CSV rows isn't how you want to spend your time on a real dataset, that's exactly what the Claude Skill is for — but everything it generates is still, underneath, exactly what you just wrote by hand.