A Guided Tour
This is the long-form walkthrough of GlyphViz's fundamentals — the window, the panels and menus, creating and shaping objects, building parent–child hierarchies, and finally topologies, the idea that makes GlyphViz a hierarchical visualizer rather than just a 3D scatter plotter. It assumes nothing beyond a working install (Installation); if you only want the five-minute version, see the Quickstart.
Everything here is hands-on. Follow along in an empty scene — you don't need to load any data until the very last section.
Keyboard shortcuts in this tour
GlyphViz leans on single-key shortcuts the way ANTz does: N, O, J, Tab, and friends act on the 3D Viewer, so they need the Viewer to have keyboard focus. If a key seems dead, click once anywhere in the 3D view first.
1. Launch GlyphViz
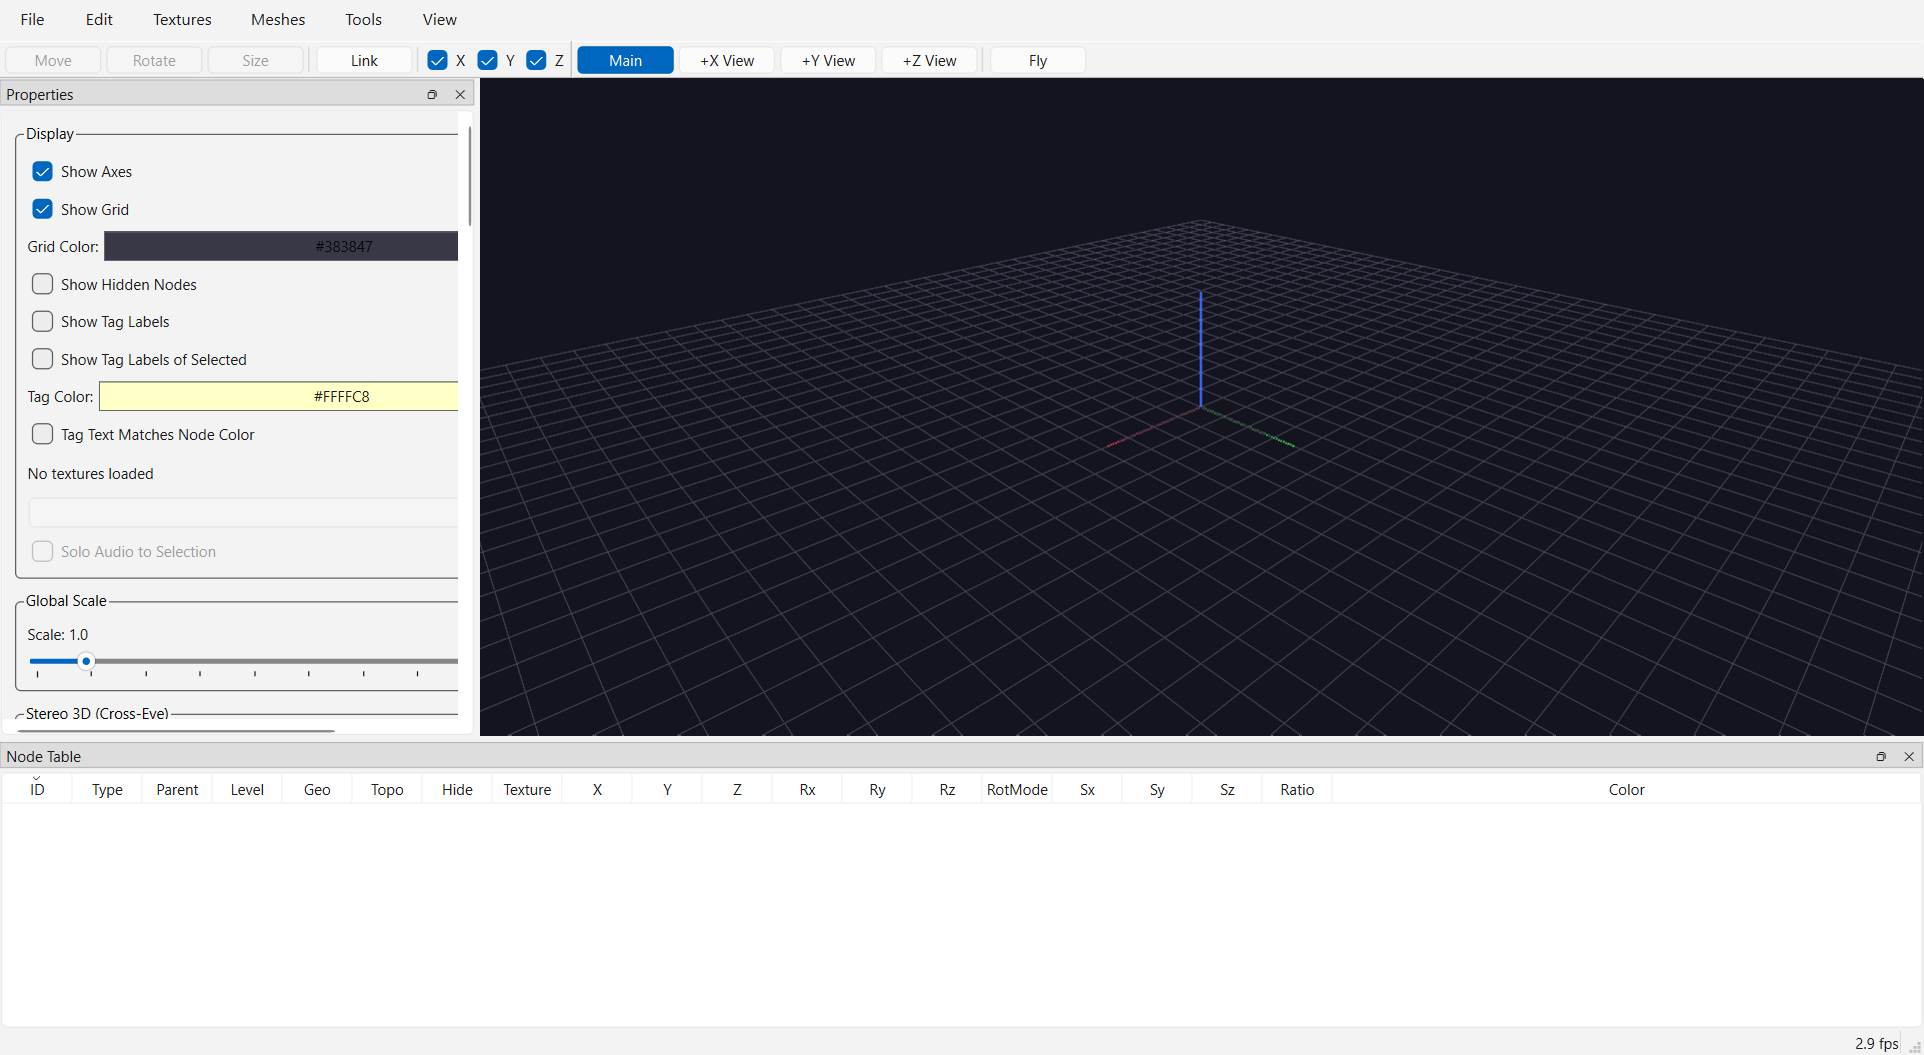
Run GlyphViz.exe from the folder you extracted (Python users: python main.py from the repo). The window opens with an empty scene: a dark 3D Viewer in the center, panels docked around it, and two toolbars across the top.
2. The window at a glance
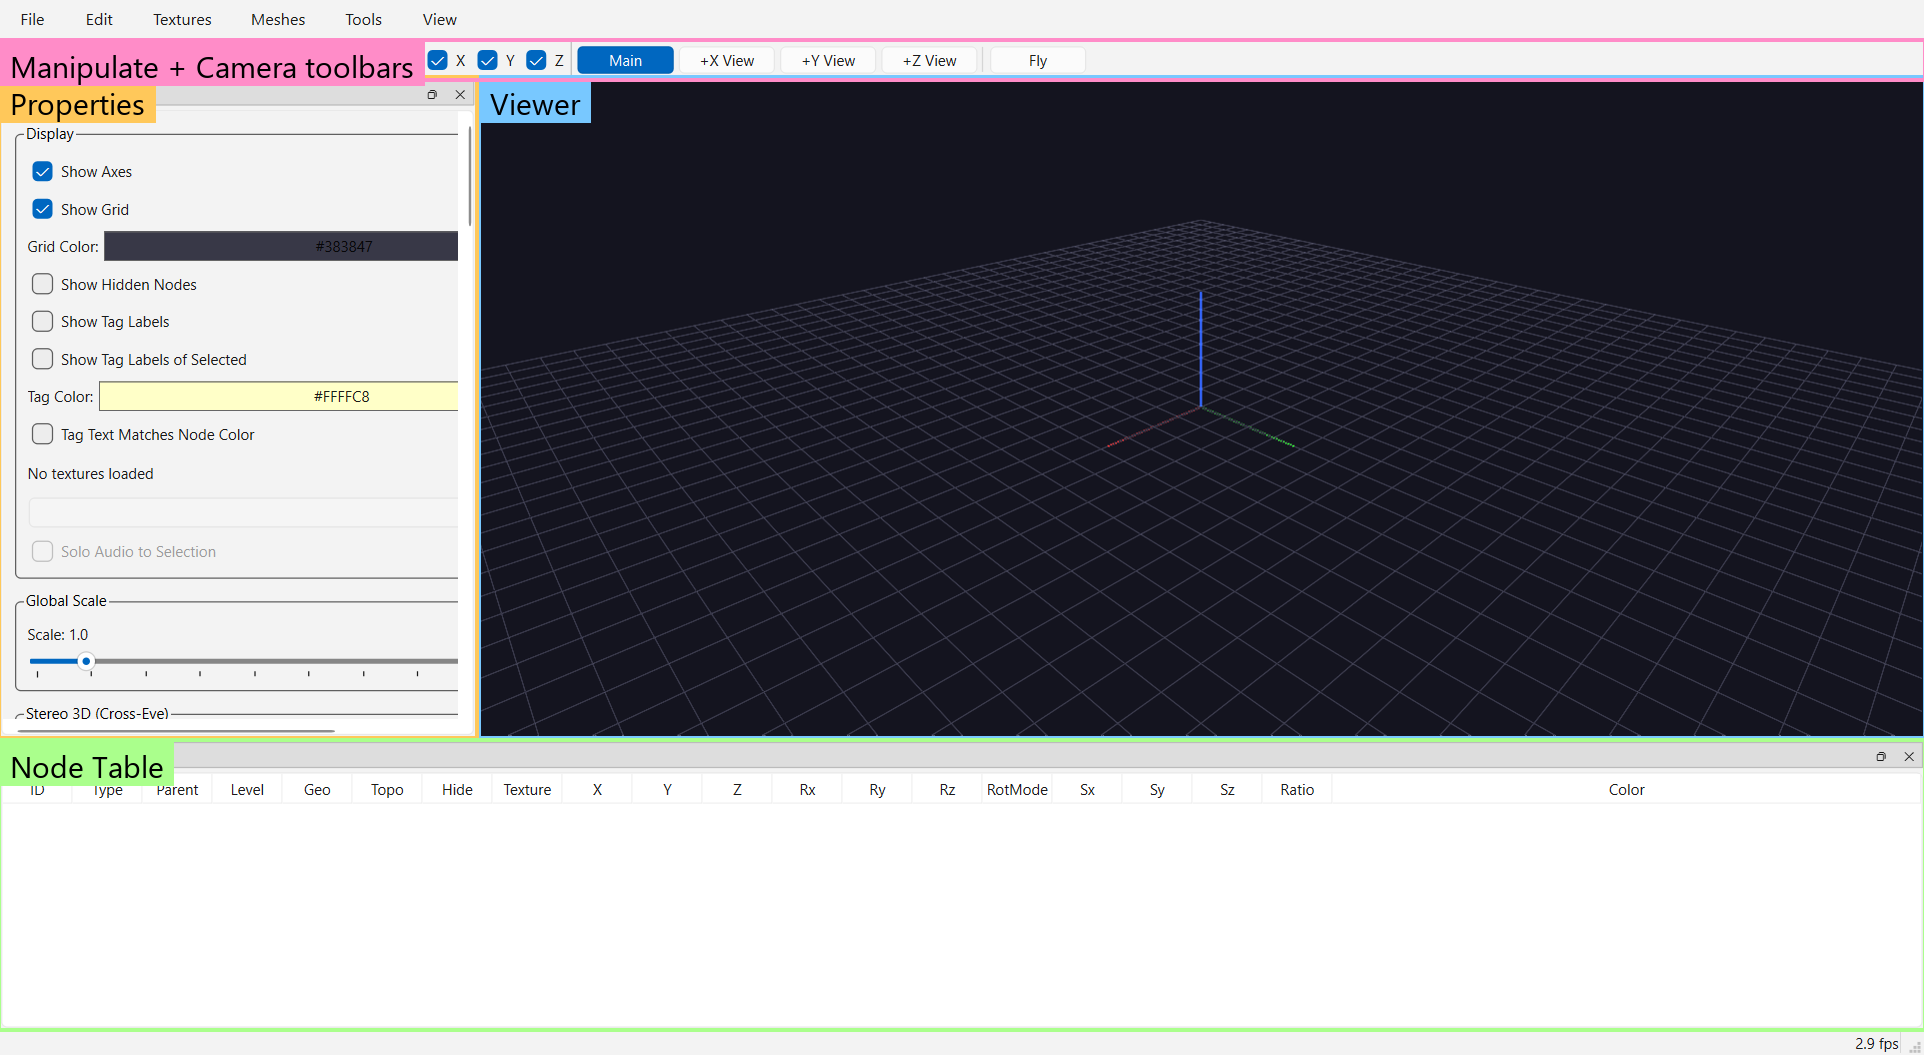
Four regions, each of which we'll use in this tour:
| Region | What it is | Show/hide |
|---|---|---|
| Viewer | The 3D scene. Camera, selection, and all single-key shortcuts live here. | Always visible |
| Properties panel | Scene-wide display settings on top (background, grid color, tag settings); the selected node's editable fields below; New Object Defaults; the World Grid and Channels groups. | Ctrl+P, or View menu |
| Node Table | Every node as a sortable spreadsheet row — the same scene seen as data. Selecting a row selects it in the Viewer and vice versa. | Ctrl+N, or View menu |
| Toolbars | Manipulate (Move / Rotate / Size / Link buttons + X/Y/Z axis checkboxes) and Camera (Main / +X / +Y / +Z views + Fly). | View menu |
Both panels are standard dock widgets: drag their title bars to float or re-dock them, click their × to close, and reopen them from the View menu — every panel and toolbar has a checkable entry there, so nothing can get lost permanently.
3. The menus
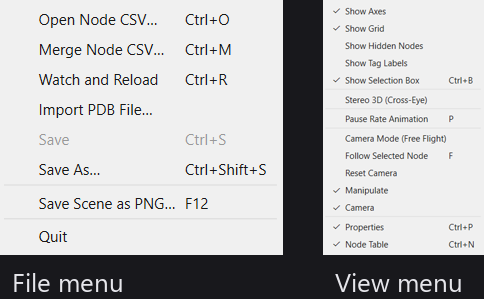
A quick orientation pass — details for each item live in the Menus reference:
- File —
Open Node CSV…(Ctrl+O) loads a scene;Merge Node CSV…(Ctrl+M) loads a second file into the current scene;Watch and Reload(Ctrl+R) hot-reloads the open CSV whenever it changes on disk (great when a script is regenerating it);Import PDB File…brings in a protein structure;Save/Save As…write timestamped node+tag CSVs;Save Selection As…(Ctrl+Alt+S) writes just the selected nodes to a file of their own;Save Scene as PNG…(F12) captures the Viewer. - Edit —
Copy/Paste(Ctrl+C/V) duplicate a node with its whole subtree;Invert Selection(Ctrl+I). Ctrl+A selects all visible glyphs. - Textures and Meshes — point GlyphViz at an image folder for textures; import OBJ/mesh files usable as node geometry.
- Tools — the
Glyph Composer…(Ctrl+G) andHyperglyph Generator…(Ctrl+H) builders; both are their own topic. - View — display toggles (axes, grid, hidden nodes, tag labels, selection box, stereo 3D),
Camera Mode (Free Flight)(C),Follow Selected Node(F),Reset Camera, and the panel/toolbar visibility entries from section 2.
You can drive this whole tour without the menus — but knowing Reset Camera exists will save you the first time you fly somewhere and lose the scene.
4. The Viewer: grid, axes, and colors
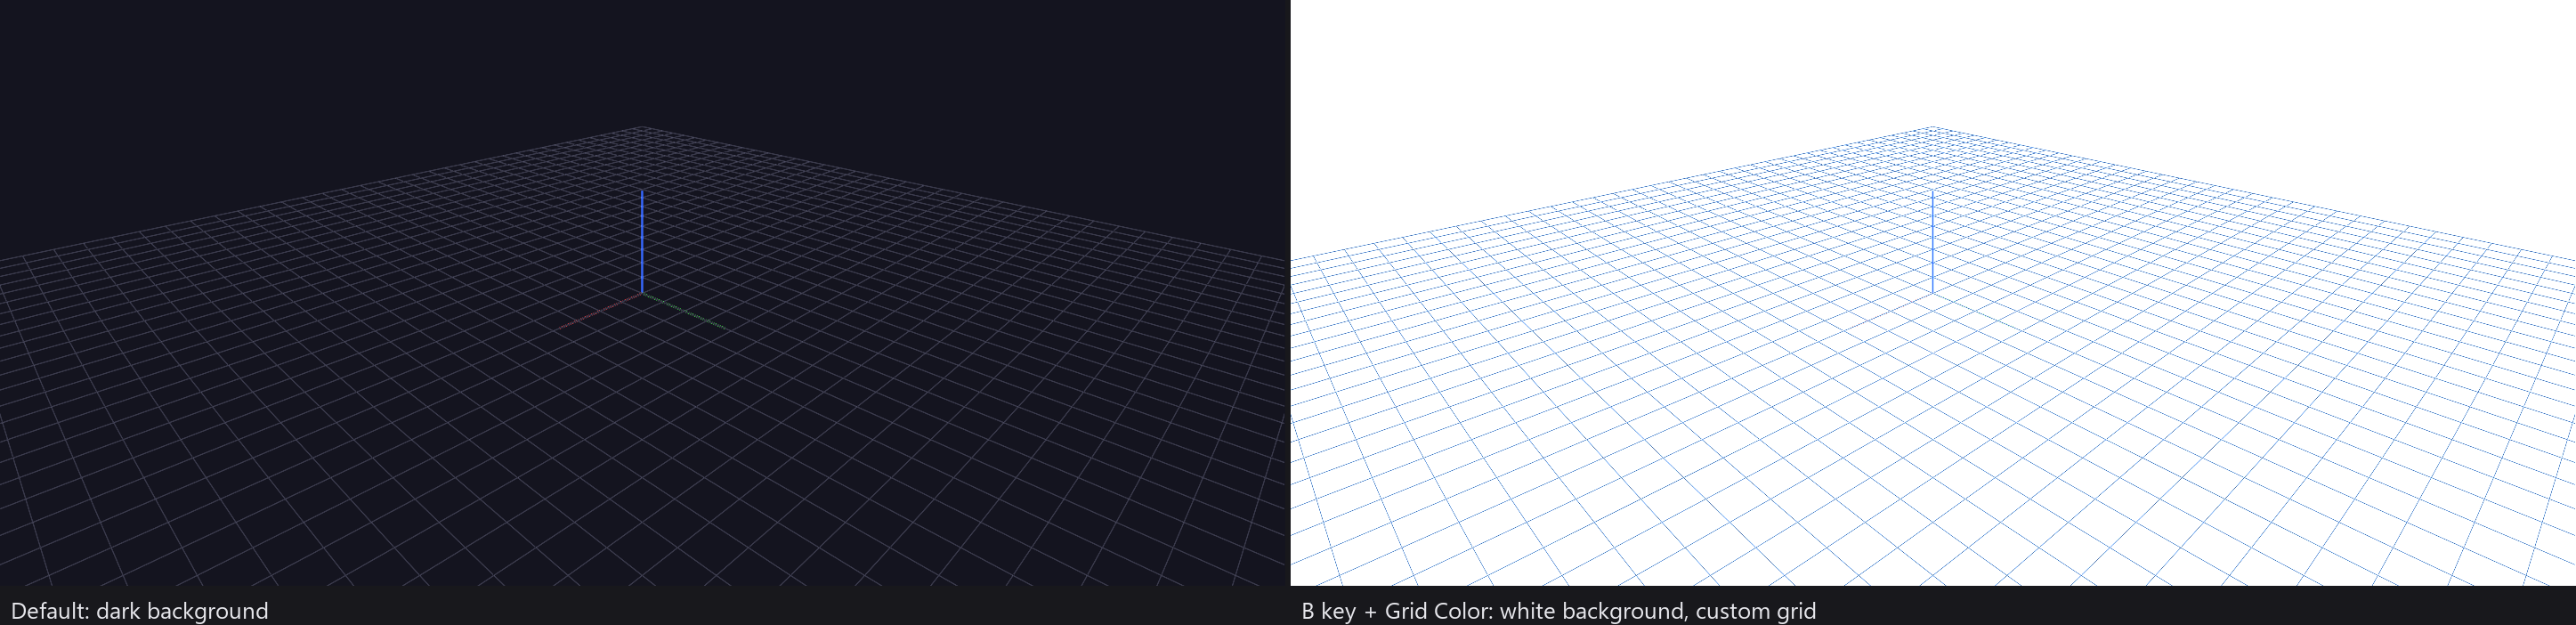
The empty Viewer isn't quite empty. Two pieces of furniture orient you:
- The reference grid — a flat lattice on the ground plane. Toggle: View → Show Grid.
- The XYZ axes — colored lines marking the world origin and directions. Toggle: View → Show Axes.
Neither is part of your data; they're never saved into your scene's nodes and never selectable.
Both the grid and the background are recolorable per scene, from the top of the Properties panel:
- Background: click the color button to pick any color. The B key toggles the background between black and white — the fastest way to check how a scene reads on a light background.
- Grid Color: click to recolor the reference grid to suit.
These choices are saved with the scene (they live on the scene's invisible World settings row), so a scene keeps its look when reopened.
5. Create your first object — the N key
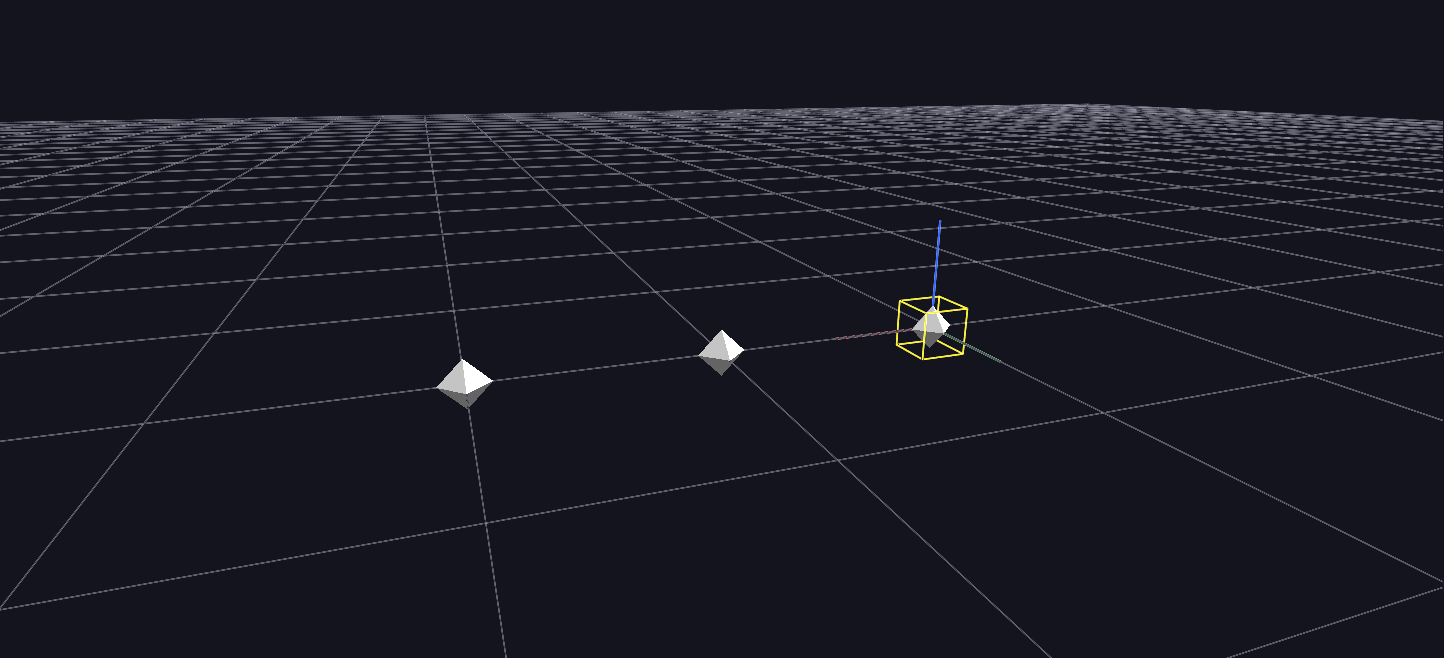
Click in the Viewer and press N. An octahedron appears at the origin.
That shape came from the New Object Defaults group in the Properties panel: every object you create with N gets the geometry, topology, scale, and color set there. The defaults start as a solid Octahedron — ANTz's traditional starter glyph — but change the dropdowns and subsequent N presses use your choices.
Make one change there now: set Topology to None. The panel's default, Point, is an ANTz convention that arranges a node's children spherically around it — translate values become angles. That's a powerful idea we'll meet properly in section 12, but for learning the hierarchy it's much clearer to work in plain Cartesian space, where translate values are ordinary X/Y/Z offsets.
Press N a few more times: each new object steps along the X axis from the last, so they line up in a row rather than stacking invisibly on top of each other. How far is the Placement Step at the bottom of the New Object Defaults — 5 units to start with, yours to change. Keep pressing past a full lap of 360 and the row wraps: X restarts at 0 and Y steps up one, so a long run arrays into a grid instead of a runaway line (see section 12 for why 360 is the magic number). These are root-level objects — they have no parent and sit directly in world space.
N is context-sensitive
With nothing selected (or a root-level object selected), N creates a new root object. If a child object is selected, N creates another child under the same parent — the same thing Shift+N does in section 8. When in doubt: click empty space to deselect, then N always makes a root.
6. Fly to it and select it
Now get close to your first octahedron using the camera:
| Action | Binding |
|---|---|
| Orbit around the scene | Left-drag (right-drag also orbits) |
| Pan / slide | Middle-drag |
| Zoom | Scroll wheel |
| Frame a specific object | Double-click it |
| Recover from anywhere | View → Reset Camera |
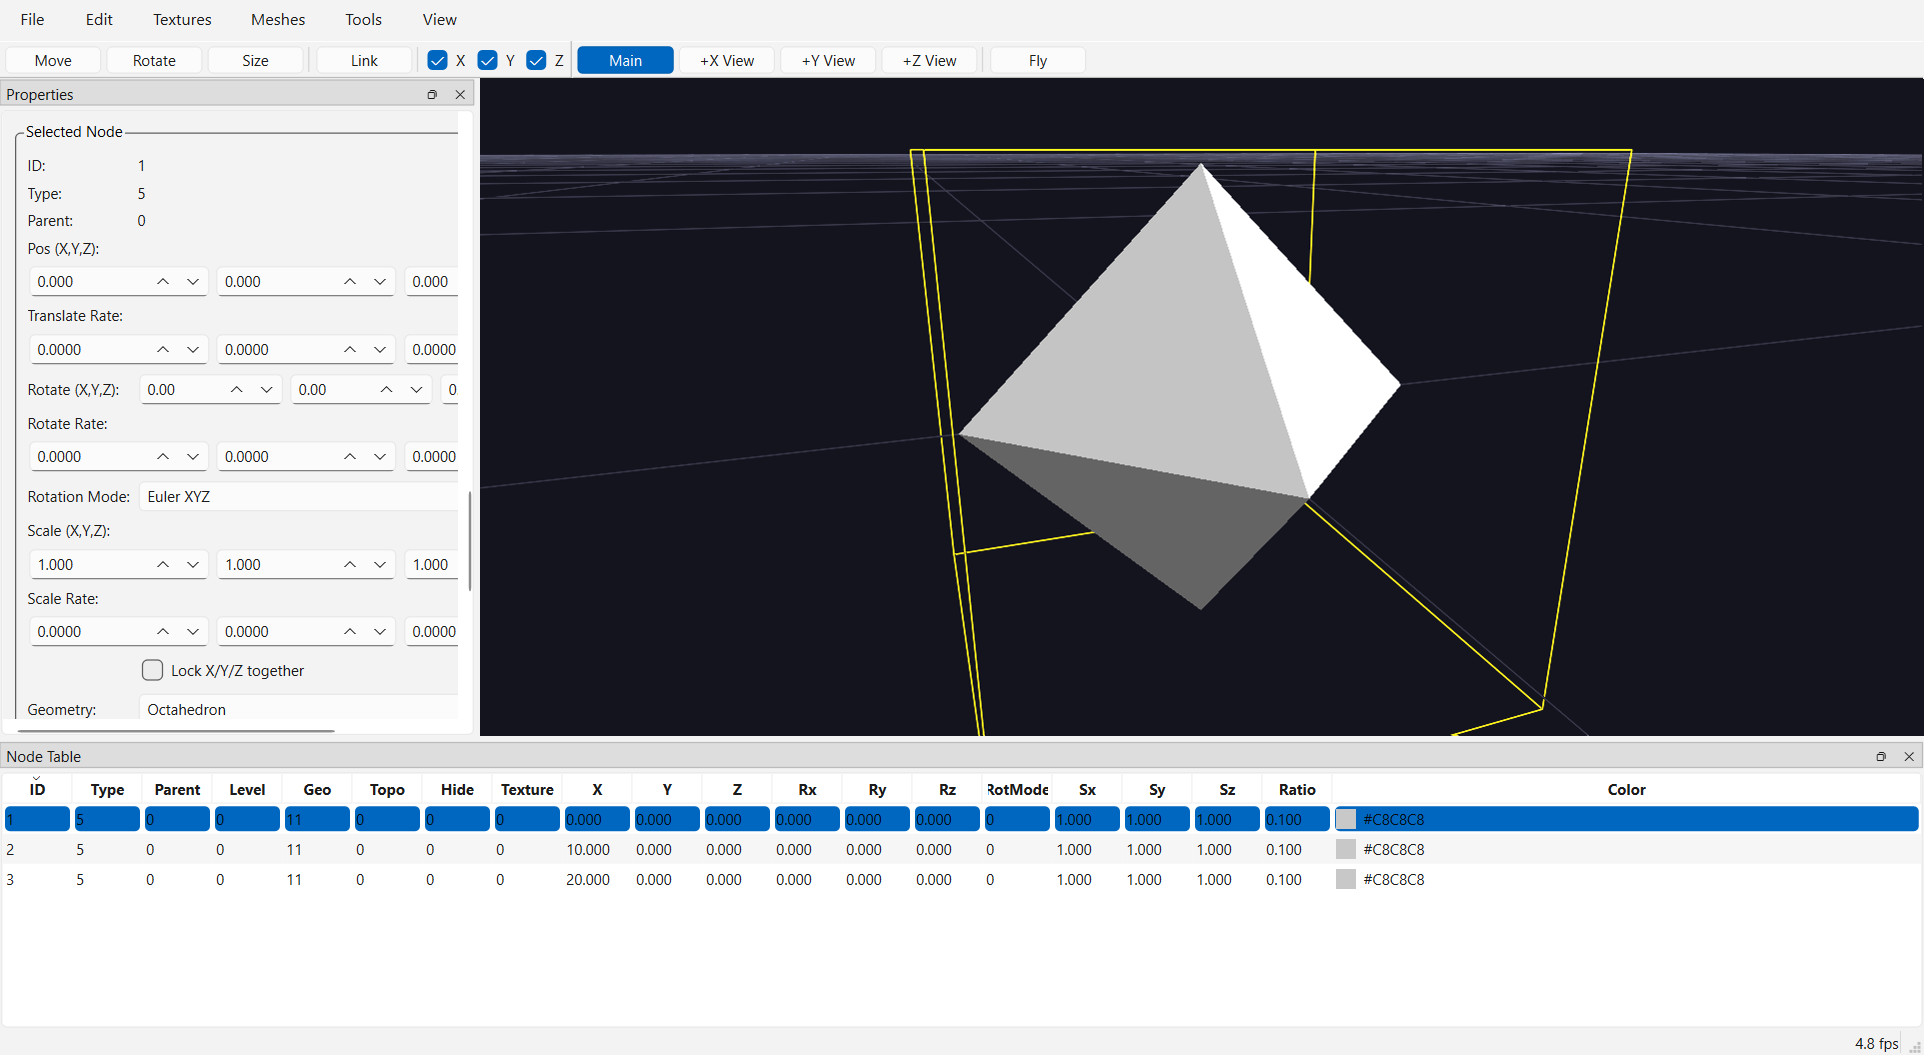
Orbit and zoom until the octahedron fills a good part of the view, then left-click it. Two things happen:
- A yellow bounding box appears around it. This is the selection halo: it tells you at a glance what is selected — invaluable once scenes have thousands of glyphs — and its extents show the object's actual bounds, which matters once scaling and children enter the picture. If it visually clutters a screenshot, Ctrl+B (View → Show Selection Box) hides it without deselecting.
- The Properties panel fills its Selected Node fields with this object's id, position, rotation, scale, and color, and the Node Table highlights its row. Panel, table, and Viewer always agree about the selection.
Ctrl+click adds more objects to the selection; Shift+drag sweeps a rubber-band box around several at once; clicking empty space clears the selection.
There's also a real flight mode — C toggles Camera Mode, where holding the left button flies you continuously through the scene — but orbit/zoom is all this tour needs. Flight is covered in Viewer Navigation.
7. Cycle the geometries — the O key
With your octahedron still selected, press O. Its shape changes. Press it again. And again.
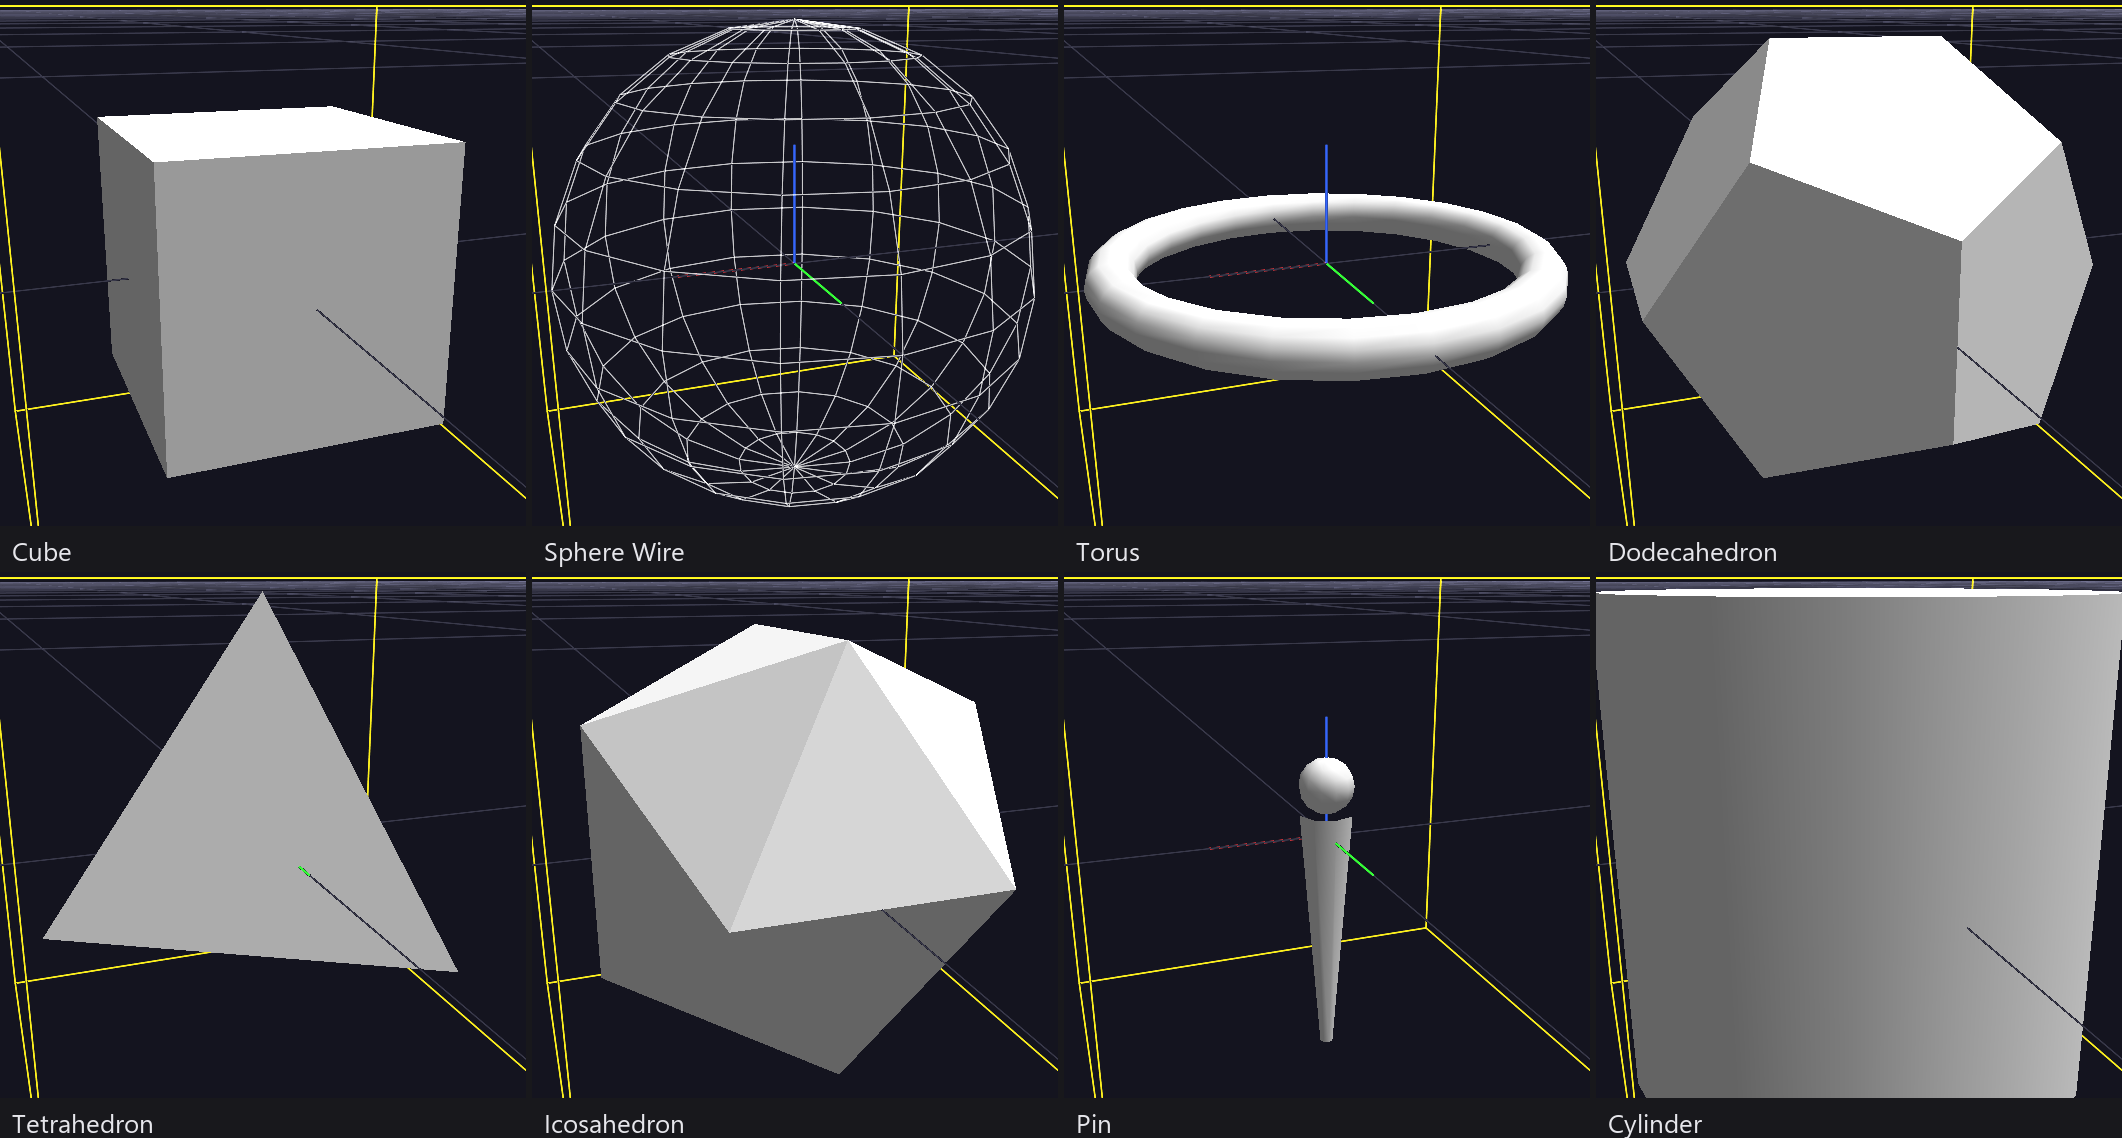
O cycles the selected object through every geometry GlyphViz can render — cube, sphere, cone, torus, dodecahedron, octahedron, tetrahedron, icosahedron, pin, cylinder, and more, each in solid and wireframe variants, plus the flat point/marker shapes. Shift+O cycles backward. This is the fastest way to audition shapes for a glyph design, and it works on a multi-selection too.
Cycle until you're back at the solid octahedron (or set Geometry back to Octahedron in the Properties panel dropdown — same field, two interfaces). Leave it selected; the next section builds on it.
The full catalog with pictures: Geometries reference.
8. Give it children — Shift+N
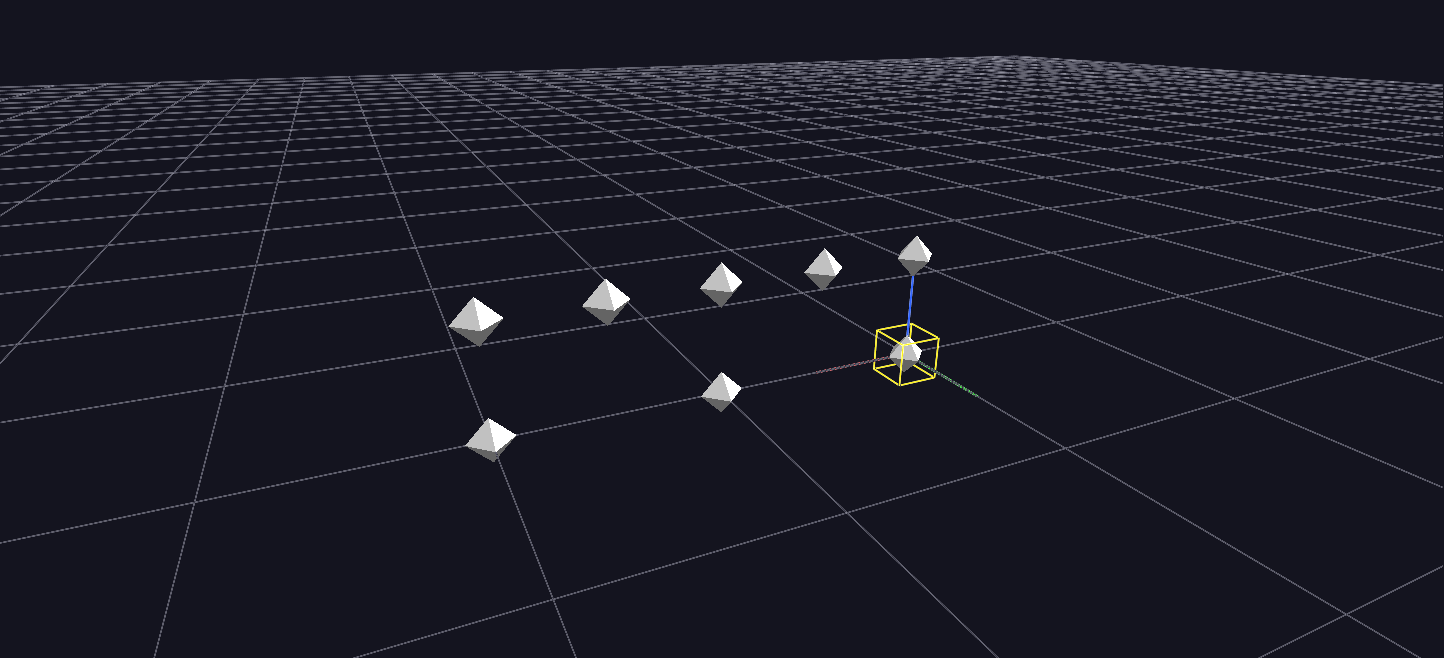
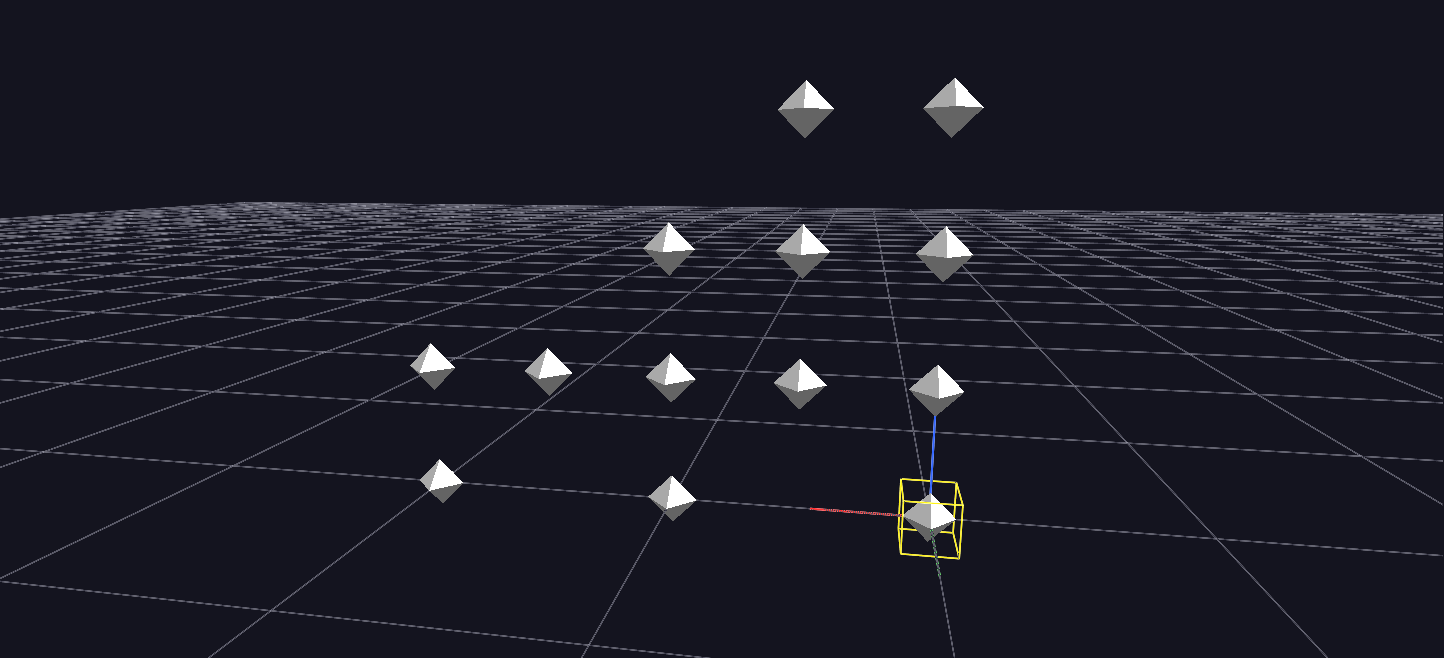
With the octahedron selected, press Shift+N. A new object appears beside and slightly above it — a child of your octahedron. ("Slightly above" is the Placement Z child setting, 5 units by default; it's what keeps the first child from being swallowed by its parent, and on a Sphere or Torus parent it's how far the child floats off the surface.) Press Shift+N several more times, and watch the children array themselves in a line: each new child places one Placement Step (5 units by default) further along the parent's local translate_x axis, so siblings never stack. Past a full lap of 360 the row wraps onto the next translate_y row, which is what keeps children on a circular parent from piling back onto the first one — you'll see that pay off in section 12.
Notice the parent stayed selected the whole time — Shift+N is built for exactly this "pump out a batch of children" gesture.
Two things make a child a child:
- Its
parent_idfield points at the parent (check the Node Table — you can watch the hierarchy exist as plain data). - It lives in its parent's local coordinate space: its translate/rotate/scale are relative to the parent, not the world. Move the parent and every child comes along.
9. Go deeper — children of children
Click one of the children to select it, then press Shift+N a few times. Now that child has children. Select one of the grandchildren and do it again.
Do this repeatedly — seriously, it's the fastest way to internalize the model. There is no fixed depth limit worth worrying about: a scene is a tree (technically a forest — many roots), and everything in GlyphViz — placement, scale inheritance, animation, topologies — is defined in terms of parent→child relationships down this tree. A "glyph" in the ANTz sense is exactly one of these subtrees, designed so its shape encodes several data dimensions at once.
10. Walk the tree — and prune it
Building trees needs a way to move around them without hunting with the mouse. Four keys navigate the hierarchy from whatever is selected:
| Key | Moves selection to |
|---|---|
| Tab | Next sibling (same parent) |
| Shift+Tab | Previous sibling |
| ↓ (down arrow) | First child — one level deeper |
| ↑ (up arrow) | Parent — one level up |
Try it: select a grandchild, walk ↑ up to the root, Tab across the roots you made in section 5, ↓ back down a branch. The yellow box hops from node to node as you go.
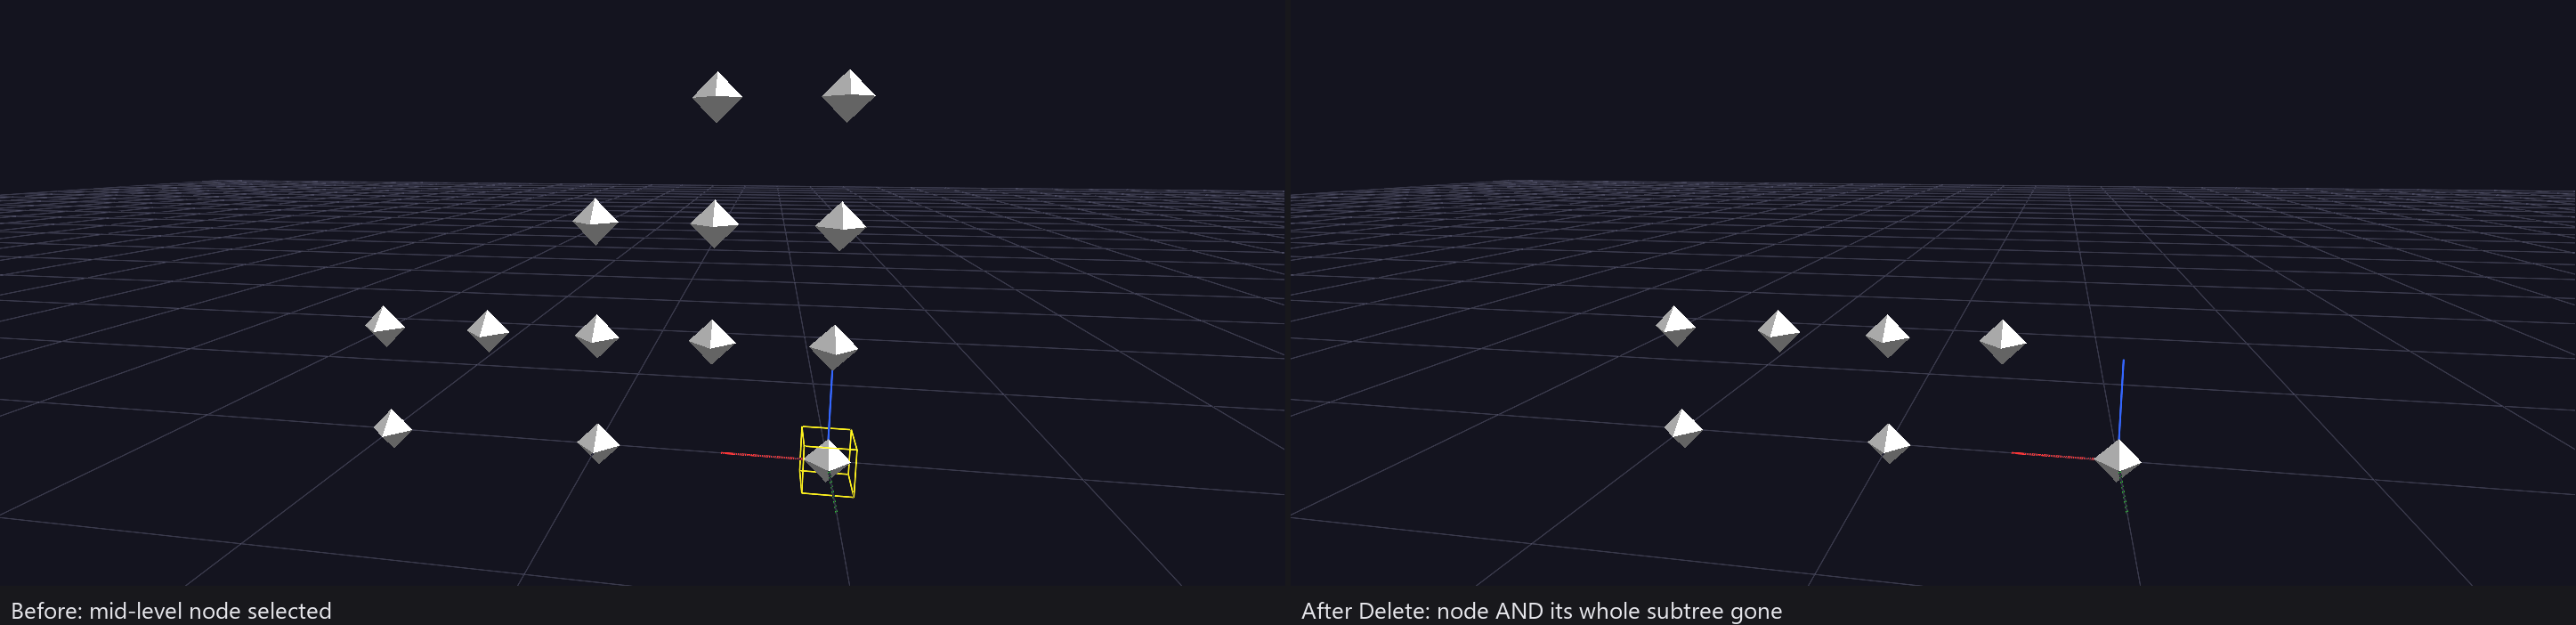
Now prune. Navigate to a mid-level node that has children under it and press Delete (or Backspace). The node disappears and so does its entire subtree — every descendant goes with it. Its parent and the rest of the tree are untouched. That's the deletion contract everywhere in GlyphViz: a node always brings its descendants, whether you're deleting, copying (Ctrl+C), pasting (Ctrl+V), or saving a selection to its own file (File → Save Selection As…, Ctrl+Alt+S — see Save Selection, which also keeps a lifted-out subtree looking exactly as it does here).
11. Shape an object — every way to modify it
Select any object (or press N for a fresh one) and work through its Selected Node fields in the Properties panel:
- Position — edit
translate_x/y/zdirectly, or click the Move button on the Manipulate toolbar and drag the object in the Viewer. The X/Y/Z checkboxes beside the mode buttons confine the drag to specific axes; with all three checked, the left button drags the first two axes and the right button drags the third. - Rotation —
rotate_x/y/zin degrees, or Rotate-mode dragging. New objects use intuitive per-axis Euler rotation. (Loaded ANTz-era files use the legacy Heading/Tilt/Roll convention; therotation_modefield switches between them.) - Scale —
scale_x/y/z, or Size-mode dragging. Non-uniform scale is fine: a stretched octahedron is a legitimate glyph element. - Color — the color button opens a picker; alpha gives you translucency. The = and − keys step the selected object through its color palette, which is its own topic (color palettes).
- Geometry / Topology — the dropdowns behind the O and J keys.
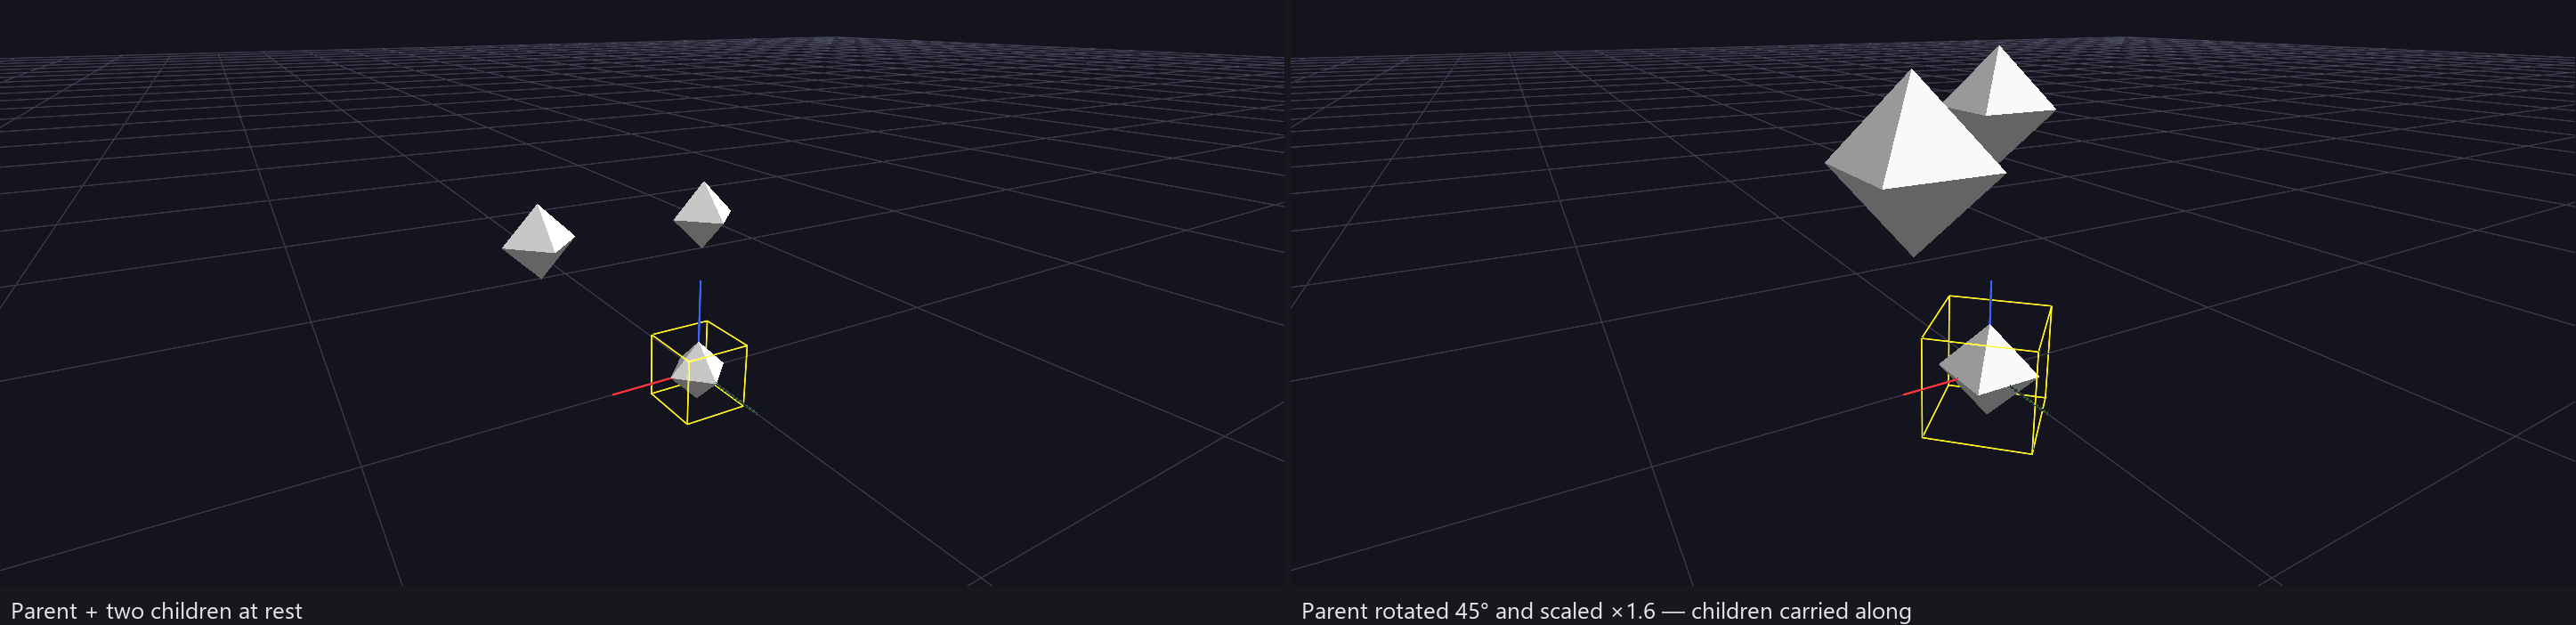
Now the important experiment: give your object a child (Shift+N), then re-select the parent and change things.
- Move the parent → the child moves with it, keeping its relative offset.
- Rotate the parent → the child orbits around it, because the child's position is expressed in the parent's rotated frame.
- Scale the parent → the child's position and rendered size scale along, keeping the family proportional.
The child's own numbers never changed — check its row in the Node Table. Everything a parent does composes onto its descendants. This is what makes a multi-level glyph act like one object.
12. Topologies — where children live
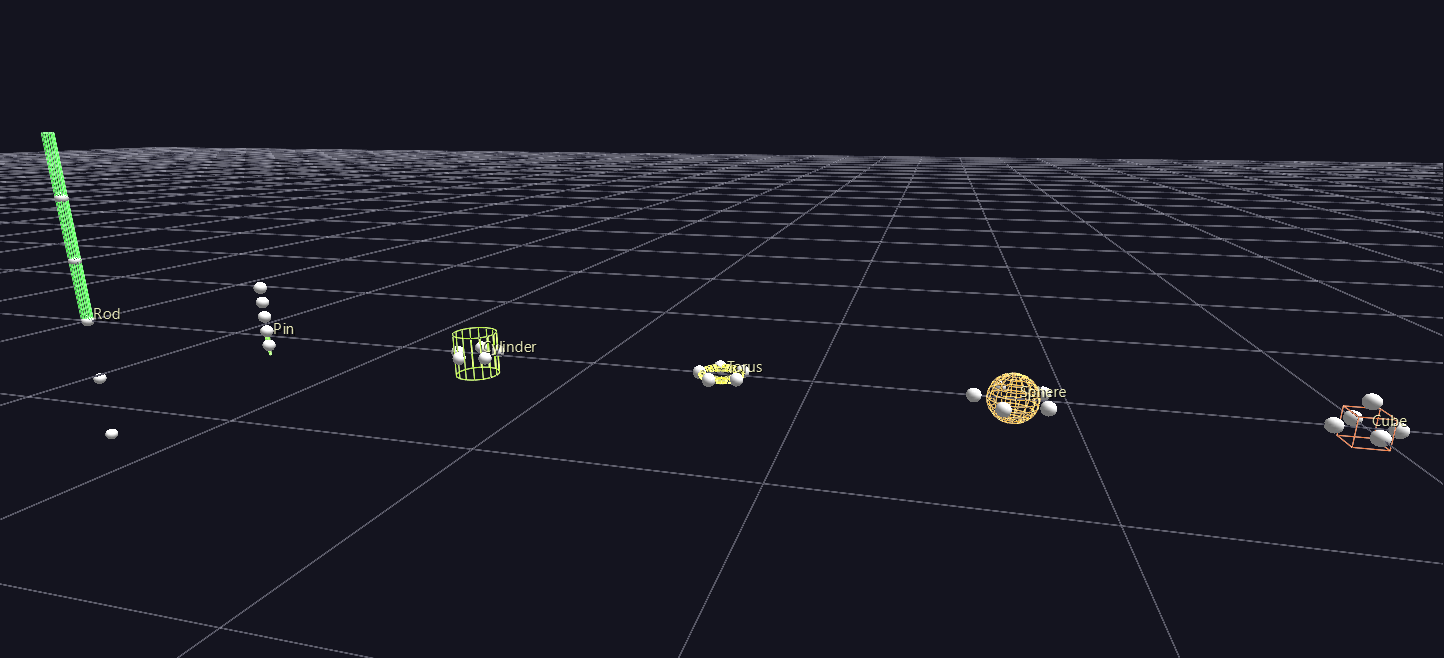
So far every child has hung in Cartesian space beside its parent. Topology is the property that changes that: it declares what kind of surface or space a node offers its children, and reinterprets the children's translate_x/y/z accordingly.
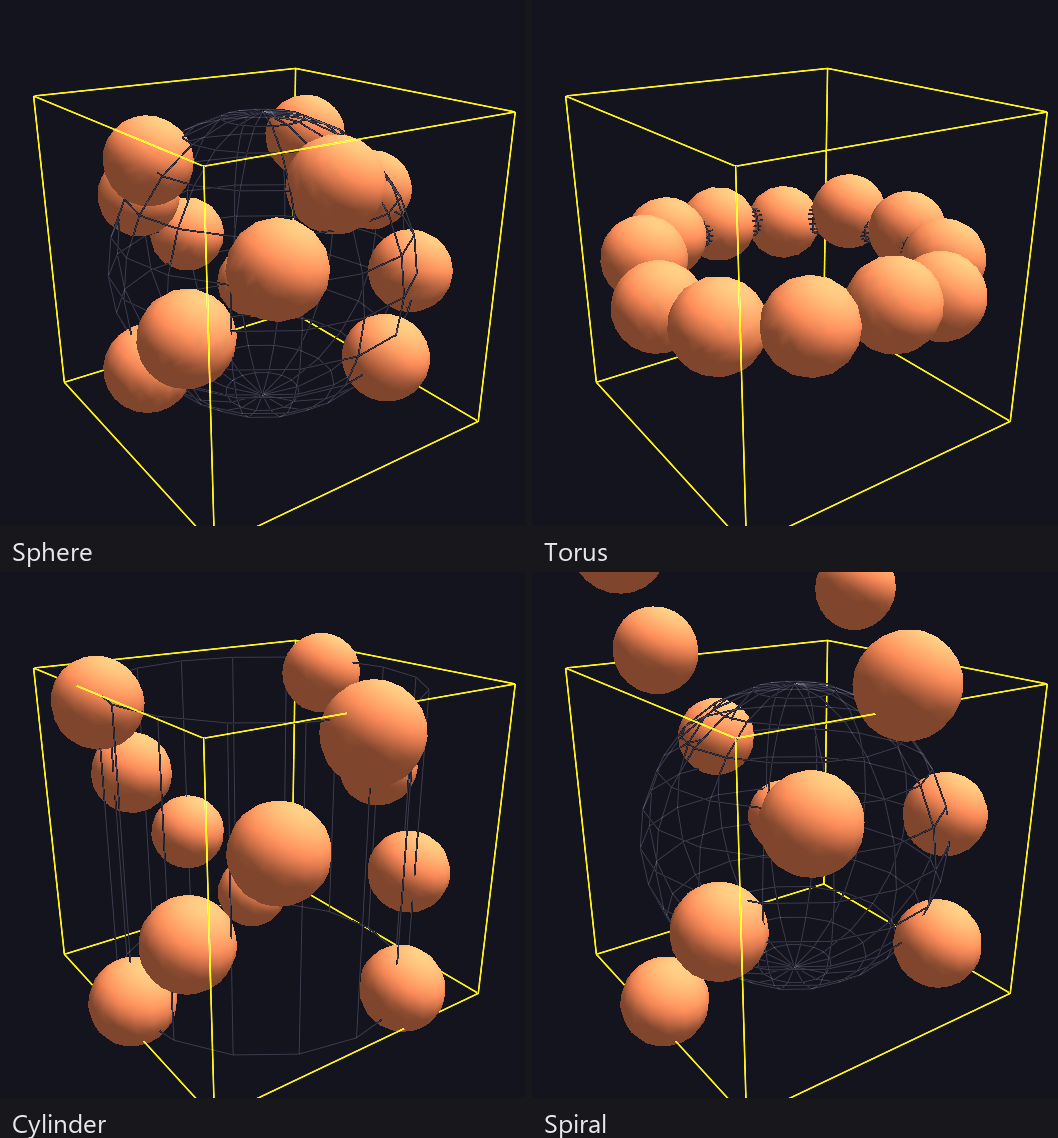
Select a parent that has several children and press J (like O, but for topology — Shift+J cycles backward). Watch the children snap into completely different arrangements:
- On a Sphere parent, a child's translate_x/y become longitude and latitude — children sit on the sphere's surface, and translate_z lifts them off it like altitude.
- On a Torus, children ride the ring.
- On a Cylinder, they wrap the barrel.
- On a Spiral, they wind outward along a coil.
- Cube places children on its six faces (the
facetfield picks which). - Plot and Surface are GlyphViz extensions for line plots and deformable grids.
- Back on Cube-space/None, translate is plain Cartesian again — what you've used all tour.
Same children, same stored numbers, radically different structure — topology is the mechanism behind glyph design, and it nests: a sphere parent can have torus children with their own children on each ring.
If the children vanish when you press J
You have found the one rough edge here. Some topologies read translate_x
as an angle (Sphere's longitude), others as a distance (a position
across a Cube's facet). A value of 200 is an ordinary angle but an enormous
distance, so children laid out around a sphere can shoot off into empty
space when the parent becomes a Cube or a Plane.
The fix is one control: select the parent and drop its Topo Scale (Properties panel, right under Topology) — the ANTz preset button next to it is the value at which a layout authored in degrees survives the switch intact. It only ever scales the distance-style axes, so it can't distort a sphere or torus arrangement. Details: Topologies → Topology Scale.
Two examples make this concrete; both ship in the examples set:
Topology_Example— a labeled scene laying the topologies out side by side, each parent showing how its children place. Load itstopology_example_gv_node.csvand orbit around.Channel_Parameters_Example— press Space after loading, and station 2 animates a parent's topology stepping through Sphere → Torus → Cylinder → Cube → Spiral while its 12 children continuously re-lay themselves out. Watching that loop for thirty seconds teaches more than any paragraph.
The full placement math, per topology: Topologies reference.
13. Paint a scene — Draw Mode
Everything so far built the scene one N press at a time. Draw Mode builds it by the hundred: press D (or click Draw Mode in the Properties panel's Create group) and the mouse becomes a brush.
The cursor turns into a crosshair. Now:
- Click anywhere on the ground grid — one object appears where you clicked, built from the same New Object Defaults that N uses.
- Click and drag — a trail of them follows the cursor, one every Stamp Spacing pixels (30 by default; set it to 0 for a dense ribbon).
- Right-drag still orbits and the wheel still zooms, so you can circle around and keep drawing from a new angle without leaving the mode.
If the scene has no World Grid, entering Draw Mode creates one — the grid is what the brush paints onto, and every stamped object becomes a real child of it. That matters more than it sounds: move, rotate or scale the grid afterwards and your entire drawing travels with it, and the whole thing saves to CSV like anything else you have built.
Then the part worth the price of admission. Open Tools → Glyph Composer, build a small hierarchy — a trunk with a few branches will do — and press Use as Draw Brush. Draw Mode switches on with that hyperglyph as the brush, and now every click plants the entire tree. Drag across the grid and you have painted a forest.
Two controls keep a forest from looking like wallpaper, both off by default:
- Heading Jitter ±° spins each stamp by a random amount, so no two face the same way.
- Scale Jitter ±% varies each stamp's size, proportions preserved.
Both draw one random value per stamp, not per node, so each tree stays internally coherent while differing from its neighbours.
Esc or D exits. Full gesture reference: Viewer Navigation → Draw Mode.
Undo doesn't exist yet
A stroke you don't like is easiest to remove with Shift+drag (rubber-band select over it) then Delete. Draw onto a fresh grid if you want to keep experiments separate from work you're happy with.
14. Where to go next
You now have the core loop: create (N / Shift+N), navigate (Tab / arrows), select, shape (O / J / Properties), and compose hierarchies whose parents carry their children. From here:
- Load real scenes — grab the examples zip (see Installation), then just drag any example folder or zip onto the window (Drag and Drop).
- Save your work — Ctrl+S writes a timestamped node+tag CSV pair; everything you built this tour is plain CSV data you can open in a spreadsheet.
- Let Claude build scenes for you — the GlyphViz Skill teaches Claude to generate valid scene CSVs directly from your data and a description of what you want. For most real datasets this is the fastest path to a first visualization, with the skills from this tour used to refine the result by hand.
- Go deeper in the reference — Viewer Navigation (flight mode, follow, stereo 3D), Properties Panel, Topologies, and Channels Animation when you're ready for time-series playback.