In this tutorial we explore the many ways you can be creative with fractal trees.
Tutorial: Drawing with the Fractal Tree Tool
Welcome to the Fractal Forest drawing app! This short tutorial will walk you through the basics of creating your first tree, customizing its appearance, and saving your final masterpiece.
1. Getting Started: Drawing Your First Tree
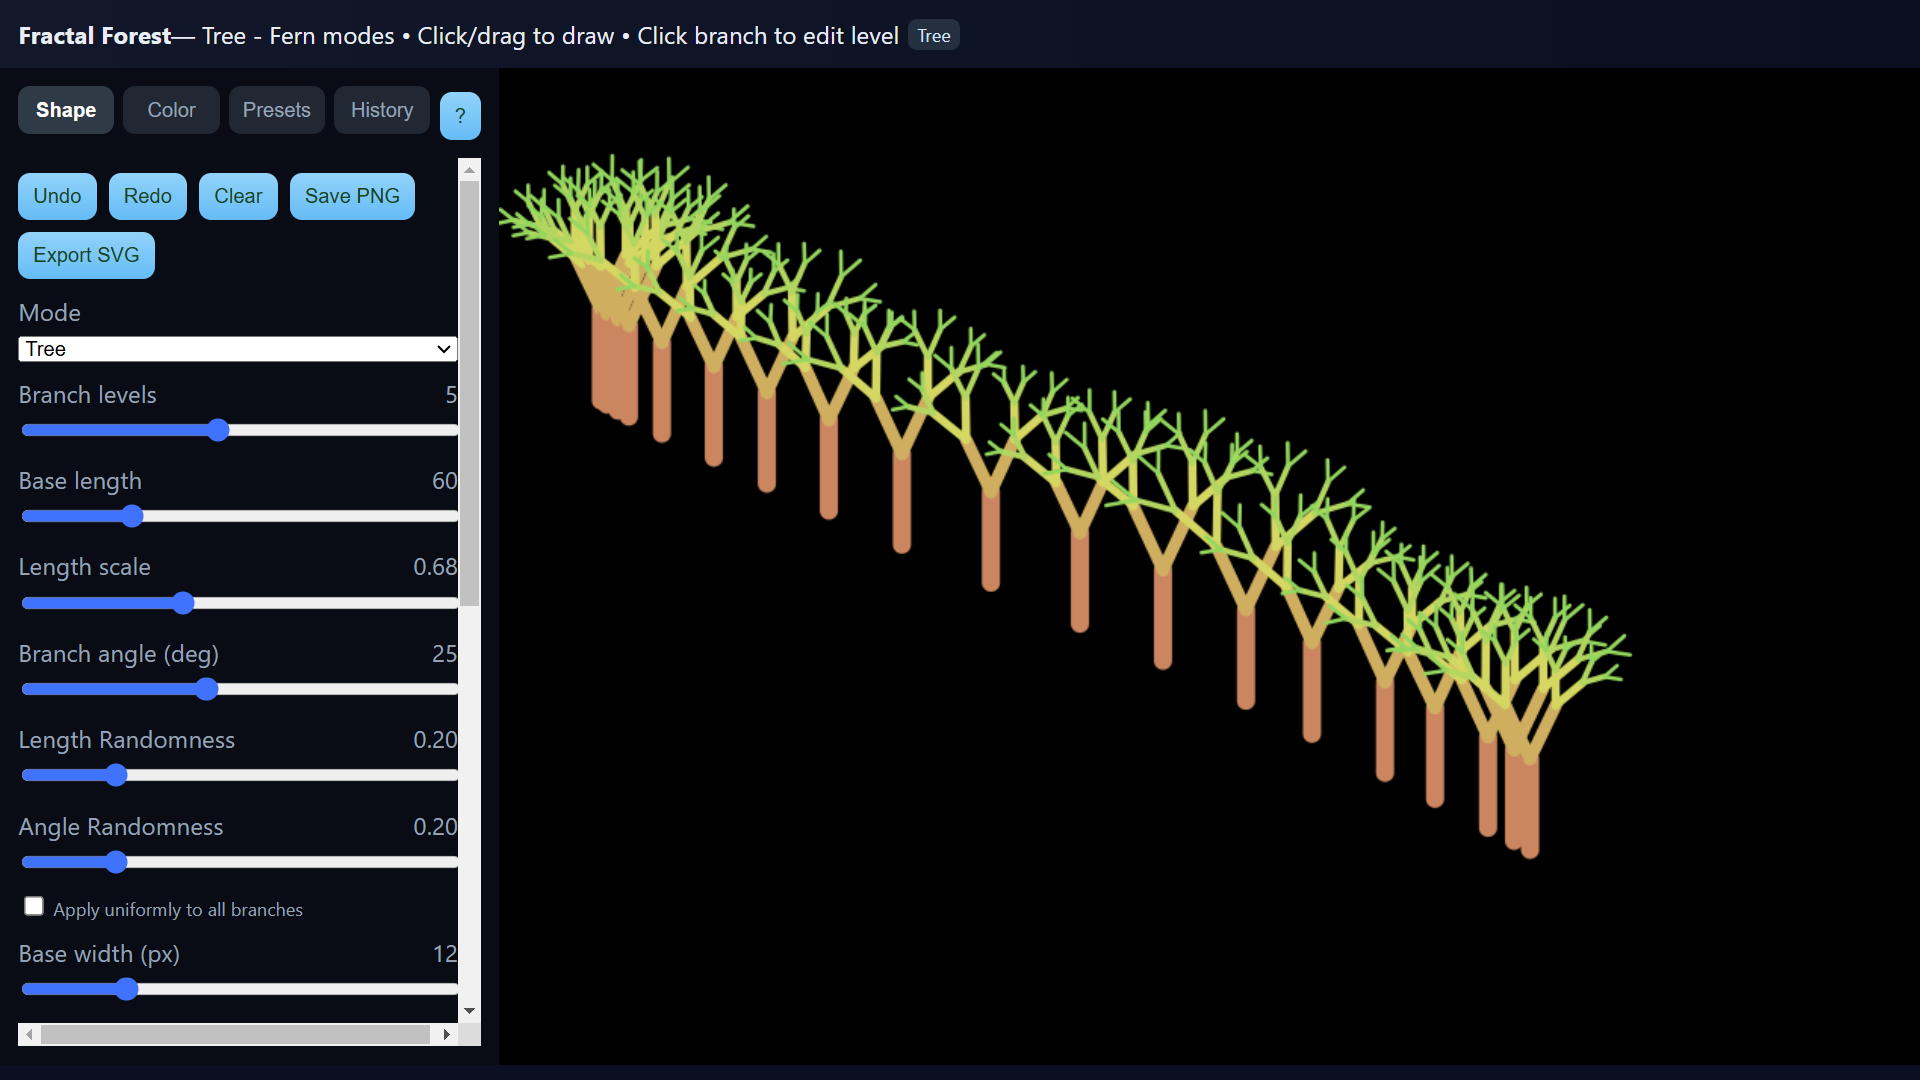
First, let's draw a basic tree. The application starts in "Tree" mode by default, so you're ready to go as soon as it loads.
-
Select Tree Mode: If you've been using another tool, make sure "Tree" is selected in the Mode dropdown menu at the top of the Shape tab.
-
Draw on the Canvas: Move your mouse over to the main drawing area on the right. Simply click and drag your mouse across the canvas. A new tree will be "stamped" every few pixels, allowing you to quickly create a dense forest.
2. Customizing Your Tree's Shape
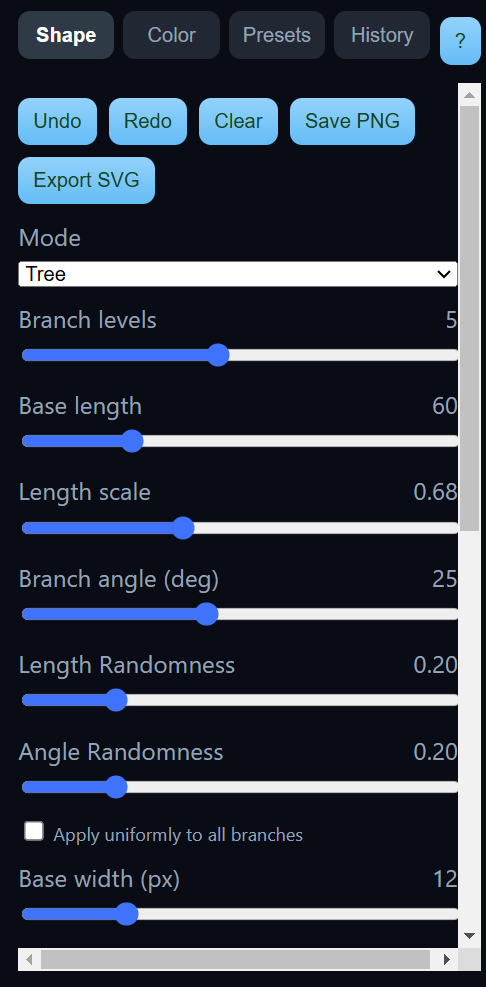
This is where the real fun begins. The sliders in the Shape tab give you complete control over your tree's appearance.
Here are the most important parameters to experiment with:
-
Branch levels: Controls the recursion depth. A low number (like 3) creates a simple, young-looking tree, while a high number (like 9) creates a very complex, detailed tree.
-
Branch angle: Sets the angle of the "Y" split at the end of each branch. A smaller angle creates a taller, thinner tree, while a larger angle creates a wider, fuller tree.
-
Length scale: This is one of the most powerful sliders. It controls how much shorter each new branch is compared to its parent. A low value (e.g., 0.6) results in a very dense, compact tree, while a higher value (e.g., 0.9) creates a sparse, sprawling one.
-
Randomness (Length & Angle): These sliders add a bit of natural chaos to your trees, preventing them from looking too perfect or uniform.
Pro Tip: Try checking the "Add Blossoms/Leaves" box to add small circles to the tip of each branch for a beautiful finishing touch!
3. Changing Your Tree's Colors
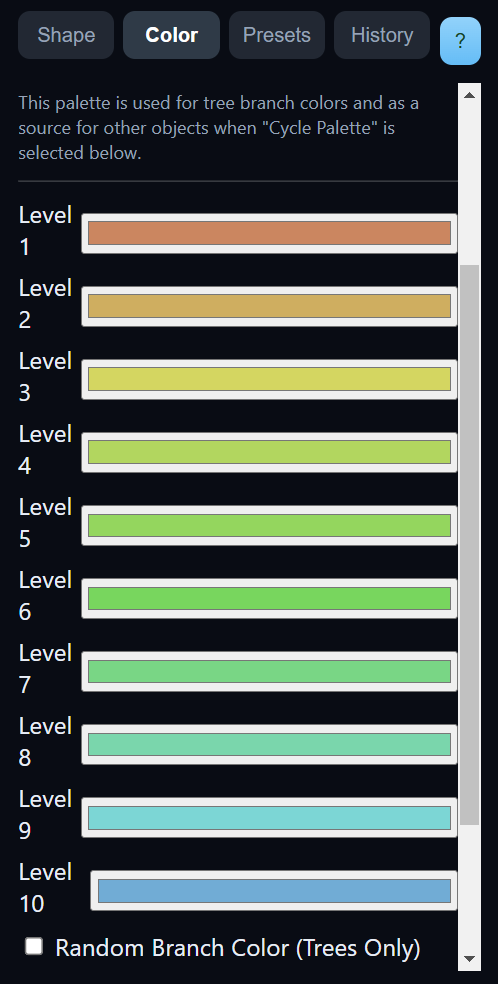
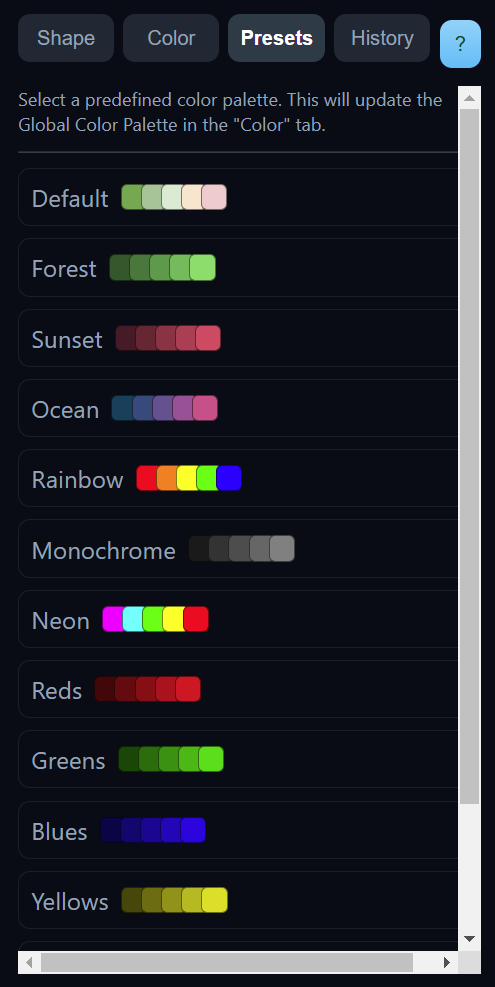
You can easily change the color of your trees using the Color and Presets tabs.
-
Using Presets (Easiest Method): Click on the Presets tab and select one of the professionally designed color palettes like "Forest" or "Sunset." This will instantly apply a new color scheme to any new trees you draw.
-
Editing Colors Manually: Click on the Color tab. Here, you will see a color picker for each "level" of your tree's branches. You can click on any color swatch to change it. The trunk is Level 1, the first set of branches is Level 2, and so on.
4. Saving and Exporting Your Artwork
Once you've created a scene you love, you have several options for saving it.
-
Save as PNG (Quickest): Click the "Save PNG" button. This will immediately download a high-quality image of your entire canvas, perfect for sharing online.
-
Export as SVG (For Professionals): Click the "Export SVG" button. This saves your artwork as a Scalable Vector Graphic, which can be edited in professional design programs like Adobe Illustrator and scaled to any size without losing quality.
-
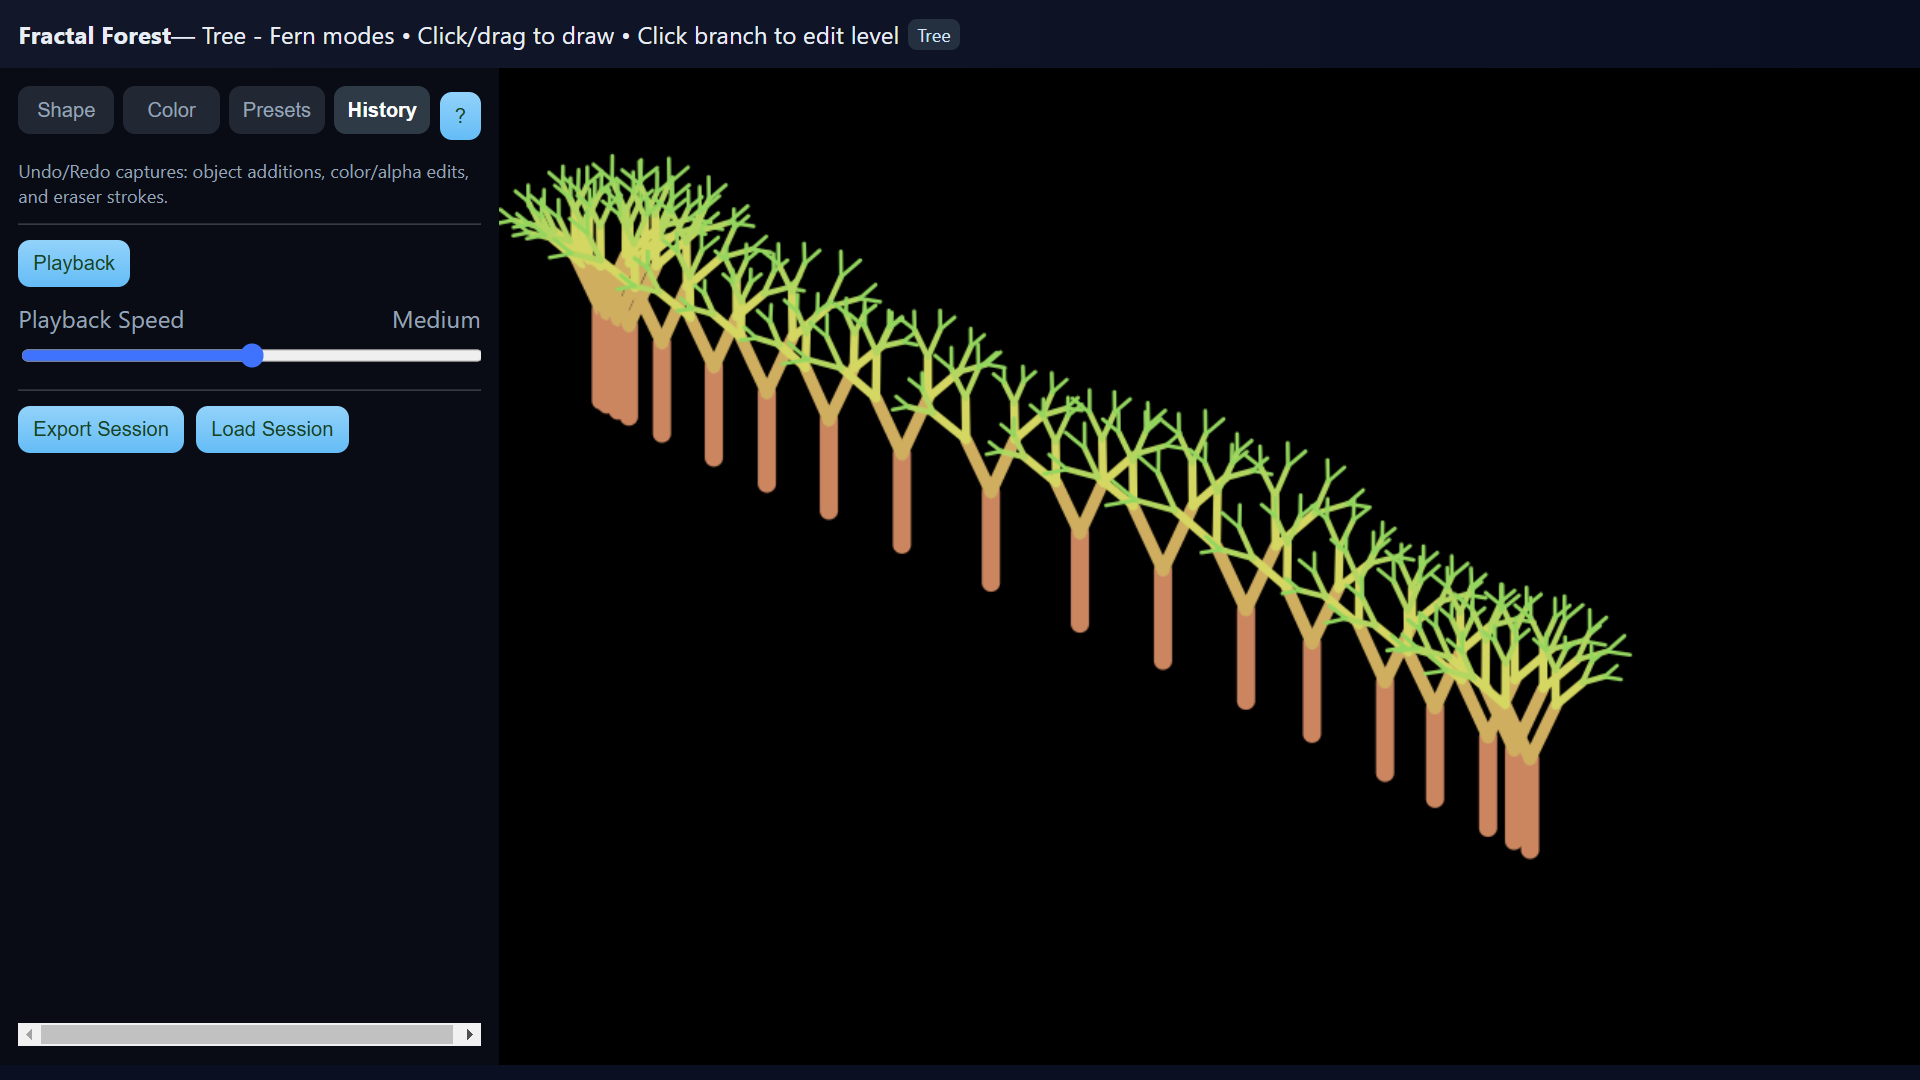
Save Your Progress (Export Session): If you're not finished with your work, go to the History tab and click "Export Session." This saves your entire project—including the full undo/redo history—into a small, compressed .json.gz file. You can load this file back into the app at any time by clicking "Load Session."
Happy creating!